Festive Fall Wreath

I created this fun festive fall wreath for Alpha Stamps. I absolutely love the tufted owls, I am especially thrilled about how the sunflower buttons made perfect little owl eyes (I was literally squealing like a demented school girl when I saw how cute they turned out). They are so adorable. This project took many 180 turns and did not come out like I had originally planned. One thing I learned doing this project was to let go of the preconceived ideas I had and just let the process flow without those preconceived notions cluttering up my brain. If I hadn’t done that the owls would never have come into being.

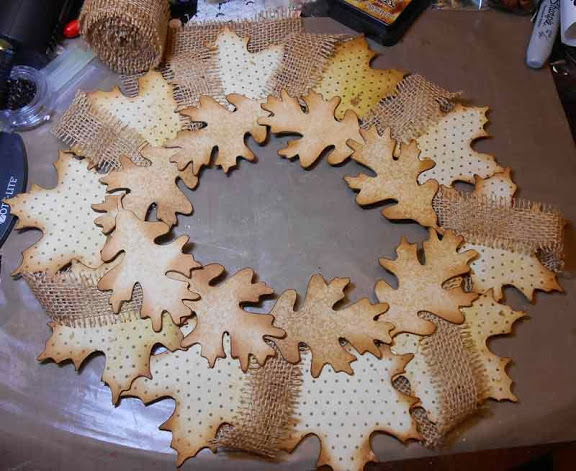
I covered 10 maple leaves with the double dot vintage chiffon scrapbook paper and 11 oak leaves with the double dot vintage decaf scrapbook paper. I then edged them all with vintage photo distress ink using an ink blending tool. I choose the neutral colors for the leaves so that the fun embellishments would stand out.

I then layed out the maple leaves in circle (but if you look closely the wreath has a bit on oval shape to it) and hot glued them together. When making a wreath you want to lay all your leaves going in the same direction. If you make a mistake and don’t get a leaf in the correct position you can heat the glue back up with a heat gun and move the leaf into the position you want. I then used a length of the burlap ribbon that came in the fall fiber set and loosely wrapped it around the wreath at an angle. I secured it to the back using hot glue.
I
then used 8 oak leaves and glued them to center of the wreath with a
hot glue gun. Again making sure they all were laying in the same
direction.
I next cut two strips of the Double Dot Vintage Papers in Vintage Chocolate, Burnt Orange, Gingerbread, Maize, and Orange Citrus 2.5 inches wide by 12 inches long. I also cut 1 strip 2.5 inches wide by 6 inches long from each of the Autumn Song papers. I then ran all these strips of paper through the Vagabond machine using the Autumn Gatherings Decorative Strip Die (be sure to use the correct setup for the die cutting machine you are using). I used an extended spacer platform and a pair of the decorative strips cutting pads.
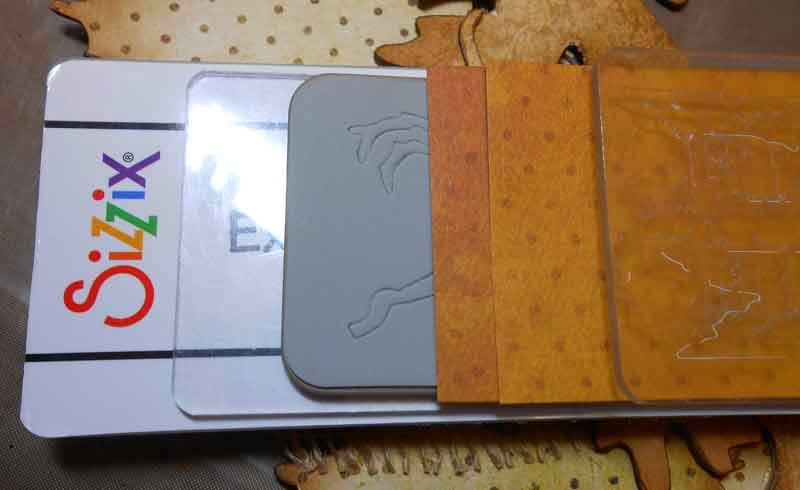
I would recommend running one layer of paper through at a time as I found that the strip wouldn’t cut entirely through two layers of the paper (even though the photo shows two). As I cut the strips of paper I kept the shapes sorted by shape and size. This came in very handy as I was building the little leaf perches and swag.

To make the owls I traced the owl shape on the scraps of Vintage Chocolate, Gingerbread, and Maize Scrapbook Paper that remained. I rounded the bottom of the owl by using a stack of pan pastels (I found this to be easier than trying to cut around the intricate little owl wings on the chipboard shape that would just be covered by the perches. I glued three of the larger birch leaf shapes from the stacks of leaves cut from the Autumn Gatherings Decorative Strip Die to make the tail feathers. I then glued two matching small feathers from the Assorted Feathers to make tufted owl feathers on the heads. I then glued the owl shapes cut from the Double Dot papers and made eyes by cutting off the shanks from two sunflower buttons and glued those on to the owls. I then glued two larger feathers on the owl to make fun little feathered wings. I set these aside to dry I as assembled the little leaf and twig perches for the owls.


I next made three little perches for the owls using the shapes I cut from the Autumn Gatherings Decorative Strip Die. I started with two to three twigs as my base glued end to end and worked from the outside in gluing down leaf shapes starting with the largest leaves first. I layered more twigs and smaller leaves as I worked my way towards the center. I let the glue dry and then glued one to each owl. I then cut the shank off an acorn button and glued that to the center of the perch.

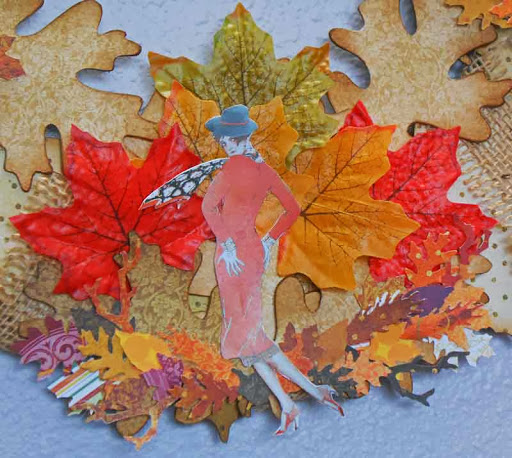
I knew the wreath need a bit more pizzaz. I cannot make a nice pretty bow out of ribbon, it’s just not in my arsenal of abilities so I decided to make this large piece for the bottom center of the wreath where a bow would normally go. I started by making a fan from the three remaining oak leaves (which is mostly covered up but you can kind of see it peeking out from behind). I then tucked some of the embossed leaves in and around the oak leaves. I then made a larger leaf swag using the same steps as before to cover the entire length of the oak leaf fan . I glued the swag to the oak leaf fan, picked this fun lady from the Falling Leaves Collage Sheet glued her in the center and then glued fan to the wreath using hot glue.
I then glued the owls in the 12, 3, and 9 o’clock positions on the wreath. I punched two holes in the top of the wreath on either side of the center owl and tied some of the fun colored raffia from the fall fiber set and dabbed a little glue on the knots to secure them.


Alpha Stamps Supplies Used:


 -
-